THE PROCESS
The 12 Critical Steps of an Advanced Exterior
Wondering what it is like to paint your home for the last time? We show you every step involved so you can virtually experience the entire process. You will learn how a professional coating is done properly, the quality materials involved, and the exceptional service that gives your home the kind of advanced exterior our customers rave about.
- Thorough Inspection.
 Before we start, it is critically important that a thorough inspection is done to determine the condition of the underlying substrates and what work will be needed. We create a plan to accomplish the work.
 - Trenching.
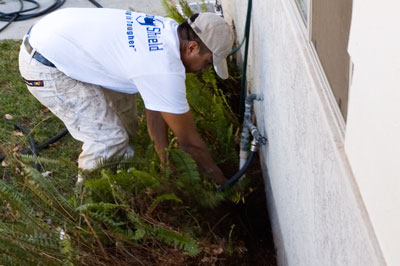 We dig a 4 to 6 inch deep trench around the foundation of your home and apply a waterproof sealant to assure a barrier of protection against water wicking up your walls and against algae, fungus, and decay below ground level. Moisture getting under an exterior paint job is the most common and damaging problem. Trenching eliminates moisture getting in at the foundation.
 - Hydro-blast with Fungicide.
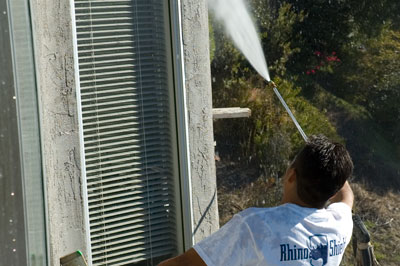 After trenching we hydro-blast the walls and overhangs, subjecting them to 3,000 pounds of direct pressure. This thoroughly cleans the surface, exposing hidden defects and removing loose paint and debris. Hydro-blasting is more powerful than sandblasting and doesn't create the dust and environmental hazards of flying paint or stucco. A fungicide is applied to prevent mold and mildew and an insecticide is applied to kill insects burrowing in your stucco.
 - Patch and Repair.
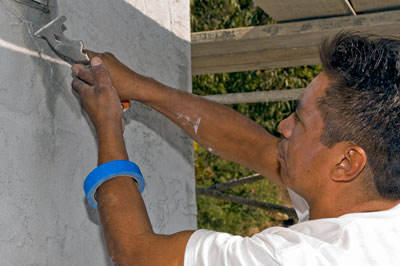 Next, all the cracks, holes, chips, and breaks on the home are filled and sealed. All damaged stucco areas are refloated to bring the surface back to its original condition.
 - Sanding and Scraping.
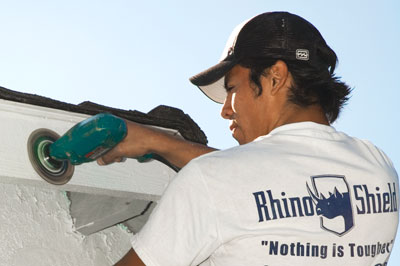 All loose paint on wood surfaces is removed by scraping and any remaining paint is sanded by hand or machine to leave a smooth surface to coat.
 - Caulking.
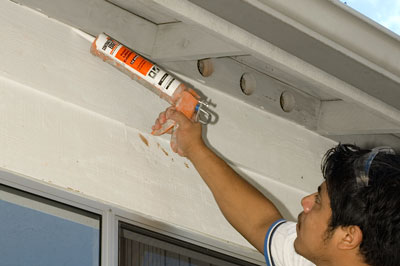 Once the wood surfaces have been scraped and sanded, we fill cracks and small holes in the wood and caulk around all windows and door casings to prevent moisture from invading the coating through these areas.
 - Masking.
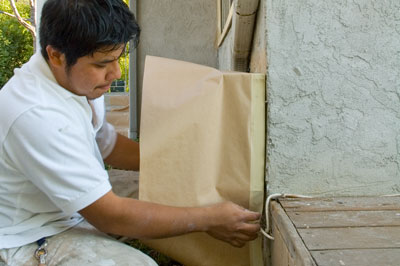 All areas which are not to be coated are masked off, covered, or temporarily removed (such as lighting fixtures, mailboxes, drainpipes, utility boxes, etc.) Special attention is given to plants, lawns, decks, windows, and other areas prone to overspray.
 - Priming.
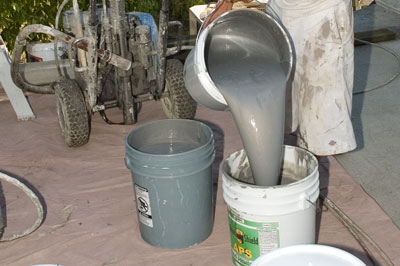 We spray on a solid coat of Rhino-Shield Adhesive Primer Sealer to act as a bonding agent to make the finish coat stay on your home without cracking or peeling. Priming is super important. (More on that below.)
 - Apply the Finish Coats.
 At last, after all the prep work and priming is completed, we spray one to two thick coats of Rhino-Shield Ceramic Coating and then back-roll by hand for a perfect finish.
 - Detail touch up.
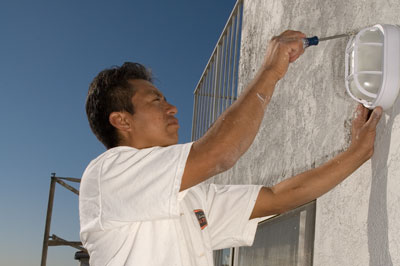 After the final finish coat is applied, we thoroughly detail everything on the exterior such as burglar bars, windows, awnings, etc., and then remove all masking materials.
 - Clean up job site.
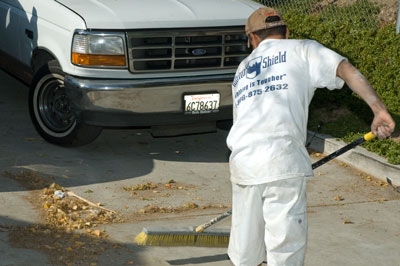 Our goal is to make your home look in brand new condition. We take great pride in giving each customer a full, thorough, and detailed cleanup to return the job site to its original condition, if not better.
 - Final inspection.
 We're not done until you're completely satisfied with our work!

“I’ve been painting homes since 1959 with over 15,000 satisfied customers. Our perfect record for nearly 50 years speaks louder than anything we can say about our commitment to ethics and integrity. Now you know the right way to coat your home!”
— Gervasio “Jerry” Andriolo
Why Priming is So Important
Until 1978, all paints contained lead based chemicals that acted as a glue to hold paints onto your home. Since then, new laws have taken everything out of paint except water, latex (acrylic or vinyl), and pigments. As there are no bonding agents in paints today, you must use a primer specially designed for each different type of surface to ensure the paint will bond to the underlying surface.
When you pick up a can of paint and look at the guarantee, the first thing you will notice is that it says this guarantee is in force only when primer is used on all surfaces and TWO finish coats are applied.
All too often, contractors only spot prime on raw wood surfaces and then shoot one thick final coat. They will even tell you this is enough. And it was with old school paint jobs.
That is why we apply a special primer to all surfaces to be coated to protect against bleedthrough and to provide a bonding surface for the coating to adhere to. In addition to waterproofing, this primer, when dry, is a sticky adhesive that acts as a bonding agent for the topcoat.
What About Wood Surfaces?
The Wood surfaces on your trim, fascia, and underhang are always in danger of dry rot and moisture damage. It is also the area of the house that needs repainting the most often. We solve this problem by hydro-blasting all the wood surfaces. Then we use a special wood filler to fill all the cracks and problem areas. (Fact: we use over a case of caulking, on average, to seal all the jointed surfaces on the wood.) Then we scrape, sand, prime the wood using Rhino-Shield Adhesive Primer Sealer. We finish with two coats of Rhino-Shield Ceramic Coating to the wood surfaces. The unique properties of Rhino-Shield allow wood to breathe while preventing moisture from permeating. This gives wood superior protection over typical paint which either suffocates and rots the wood or peels and flakes and allows moisture to damage the wood.
Summary of Steps
- Inspect
- Trench
- Hydro-blast
- Patch and Repair
- Sand and scrape
- Seal and caulk
- Mask
- Apply adhesive primer/sealer
- Apply ceramic coating
- Detail touch up
- Clean job site
- Final inspection